Mac Development Setup
Setup for engineers working with Python, C++, Rust, and LaTeX.


Over the years, I've experimented with countless tools and configurations. This guide reflects the balance I've found between power and simplicity.
Here are all the essential tools you need to install and set up to get started.
Command Line Tools
The Command Line Tools package includes the Apple LLVM compiler, linker, Make, and other essential utilities for building and debugging software on macOS.
1. Remove old Command Line Tools
When upgrading your macOS development environment, remove old versions of the Command Line Tools to avoid conflicts.
Run the following command in the terminal:
sudo rm -rf /Library/Developer/CommandLineTools2. Install the Command Line Tools
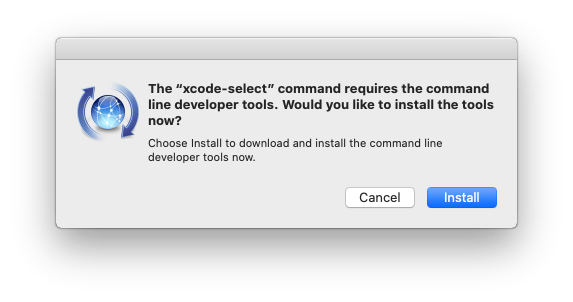
xcode-select --install3. Confirm installation
When the software update popup appears, click Install and accept the Terms of Service to proceed with the installation.
4. Verify installation
After installation, the Command Line Tools are located at:
/Library/Developer/CommandLineTools/Homebrew

Homebrew is the missing package manager for macOS.
Installing Homebrew
Open the terminal and run the following script:
/bin/bash -c "$(curl -fsSL https://raw.githubusercontent.com/Homebrew/install/HEAD/install.sh)"Homebrew commands
# Update Homebrew
brew update

# Search a package
brew search <package>

# Show package info
brew info <package>

# List outdated packages
brew outdated

# Upgrade a package
brew upgrade <package>

# Upgrade all packages
brew upgrade
Git

Git is a free and open source distributed version control system.
1. Install Git using Homebrew
brew install git2. Set Git username and email
git config --global user.name "Your Name"
git config --global user.email "your@email.com"
3. Set Git terminal colors for dark and light mode
git config --global color.ui true
git config --global color.status.changed "yellow bold"
git config --global color.status.untracked "red bold"
git config --global color.status.added "green bold"
git config --global color.status.updated "cyan bold"
git config --global color.status.branch "magenta bold"
git config --global color.status.header "cyan bold"
4. Check Git configuration
git config --global --listTerminal
As a pragmatic engineer, I keep my setup minimal, using the default macOS Terminal.
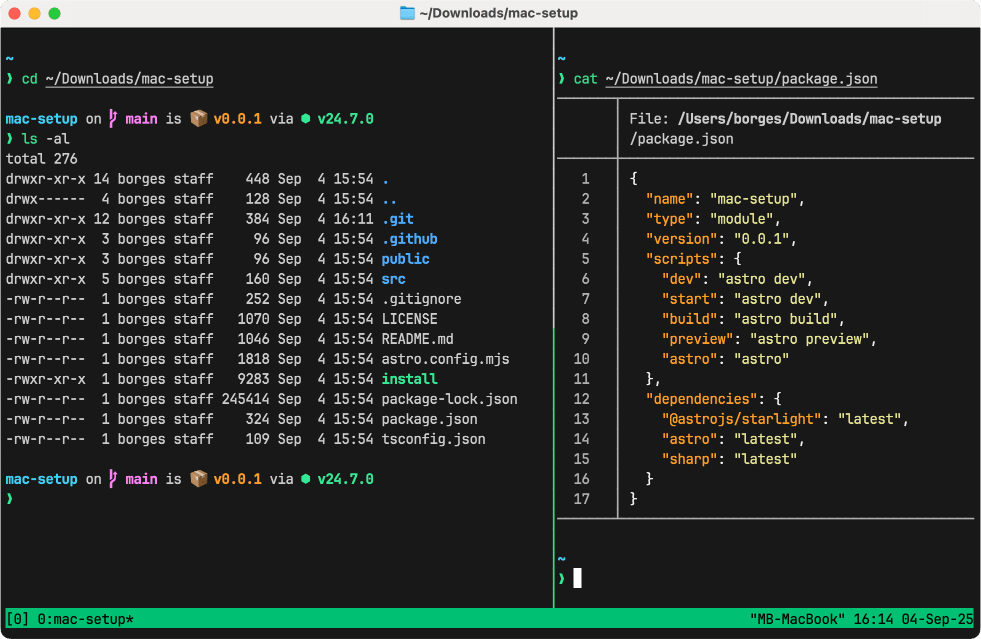
1. Install JetBrains Mono Nerd Font
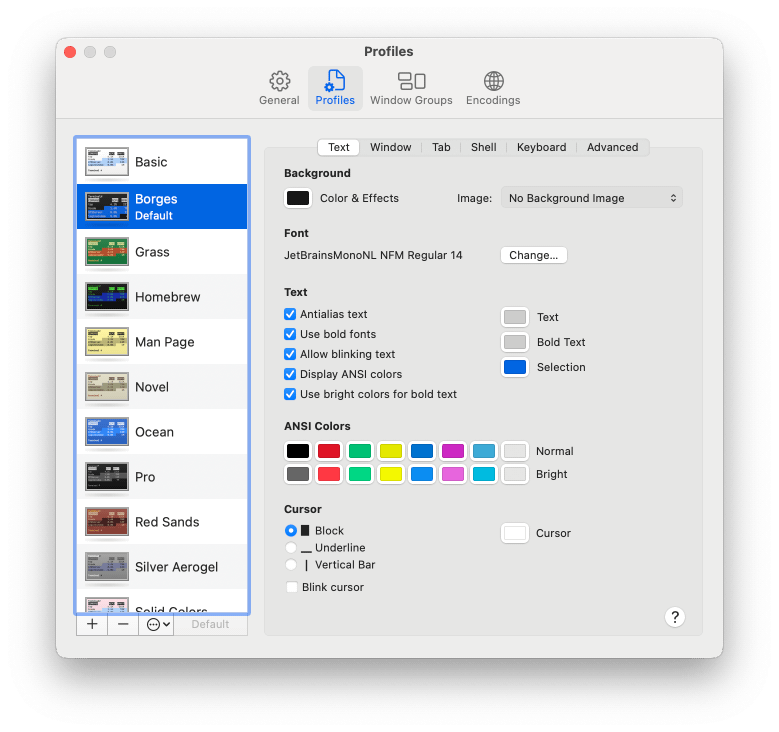
brew install font-jetbrains-mono-nerd-font2. Terminal profile configuration
- Background:
#181818 - Font: JetBrainsMonoNL Nerd Font Mono, Regular, 14
- Text:
#CCCCCC - Bold Text:
#CCCCCC - Selection:
#084AD9 - Use Bright colors for bold text
Shell Prompt - Starship

My favorite Shell Prompt is Starship. It works out of the box with minimal configuration and requires only a Nerd Font. My preferred choice is JetBrains Mono.
Starship gives me:
- Git status (branch, changes, ahead/behind)
- Language/runtime versions (Node, Python, Rust, Go, etc.)
- Package version info (npm, Cargo, etc.)
- Minimal, fast, customizable prompt style
Install Starship
brew install starshipShell - Zsh

The Z shell or Zsh has been the default shell on macOS since October 2019. I use it with a few extra plugins:
- zsh-autosuggestions
- zsh-syntax-highlighting
- GNU Coreutils for an improved
lscommand - Bat for
catwith syntax highlighting
1. Install Zsh plugins
brew install zsh-autosuggestions zsh-syntax-highlighting2. Install GNU Coreutils and Bat
brew install coreutils bat3. Backup the current .zshrc file
if [[ -f "${HOME}/.zshrc" ]]; then
    cp "${HOME}/.zshrc" "${HOME}/.zshrc.bkp"
fi
4. Update the .zshrc file
Copy and paste that in the terminal:
ZSHRC="$(cat <<'EOF'
# Homebrew environment
if [[ "$(/usr/bin/uname -m)" == "arm64" ]]; then
    HOMEBREW='/opt/homebrew' # ARM
else
    HOMEBREW='/usr/local'    # Intel
fi
eval "$(${HOMEBREW}/bin/brew shellenv)"

# Zsh completion
autoload -Uz compinit && compinit
zstyle ':completion:*' menu select

# Zsh plugins
source "${HOMEBREW}/share/zsh-autosuggestions/zsh-autosuggestions.zsh"
source "${HOMEBREW}/share/zsh-syntax-highlighting/zsh-syntax-highlighting.zsh"

# Starship prompt
eval "$(starship init zsh)"

# Keybindings for history search
bindkey '^P'   history-beginning-search-backward # Ctrl-P
bindkey '^N'   history-beginning-search-forward  # Ctrl-N
bindkey '^[[A' history-beginning-search-backward # Up arrow
bindkey '^[[B' history-beginning-search-forward  # Down arrow

# Aliases for better defaults
alias cat="bat"
alias grep="grep --color=auto"
alias ls="gls --color --group-directories-first"

# VIM environment
export VIMINIT='syntax on | set number'

# History
setopt INC_APPEND_HISTORY   # Write history as commands are entered
setopt HIST_IGNORE_ALL_DUPS # Remove older duplicate entries
setopt HIST_REDUCE_BLANKS   # Remove extra spaces
setopt HIST_IGNORE_SPACE    # Commands starting with space not saved
EOF
)"

echo "${ZSHRC}" > "${HOME}/.zshrc"
source "${HOME}/.zshrc"
Visual Studio Code

Visual Studio Code or VS Code is a lightweight yet powerful source code editor developed by Microsoft.
It comes with several built-in features that work without requiring additional extensions, including support for Docker, Git, HTML, CSS, JavaScript, TypeScript, JSON, Markdown, YAML, and more.
I've tried several tools like Neovim, Zed, Cursor, and JetBrains editors. They're all powerful, but given my needs and minimalist approach, VS Code remains my favorite editor. My second choice is Zed, which is still in development but might take the top spot soon.
1. Install VS Code
brew install visual-studio-code2. Add VS Code command to the terminal
You can run VS Code from the terminal by typing code after adding it to the PATH.
Paste that in the terminal prompt:
SOURCE='/Applications/Visual Studio Code.app/Contents/Resources/app/bin/code'
TARGET='/usr/local/bin/code'
sudo ln -snf "${SOURCE}" "${TARGET}"3. Set VS Code as the default Git editor, diff, and merge tool
git config --global core.editor 'code --wait'

git config --global diff.tool vscode
git config --global difftool.vscode.cmd 'code --wait --diff $LOCAL $REMOTE'

git config --global merge.tool vscode
git config --global mergetool.vscode.cmd 'code --wait $MERGED'
VS Code Extensions
With extensions, you can add languages, debuggers, and tools to customize your setup and enhance your development workflow.
Install Python extension
code --install-extension ms-python.pythonInstall C/C++ extension
code --install-extension ms-vscode.cpptools
Install rust-analyzer extension
code --install-extension rust-lang.rust-analyzer
Install LaTeX Workshop extension
code --install-extension James-Yu.latex-workshop
Install Live Preview extension
code --install-extension ms-vscode.live-server
Live Preview
Live Preview allows you to preview static web projects within the editor or in an external browser.
VS Code Settings
Copy and paste that in the terminal:
SETTINGS="$(cat <<'EOF'
{
    "window.newWindowDimensions": "maximized",
    "window.title": "${folderPath}",

    "workbench.activityBar.location":"bottom",
    "workbench.startupEditor": "newUntitledFile",

    "extensions.ignoreRecommendations": true,
    "telemetry.telemetryLevel": "off",

    "editor.fontFamily": "JetBrainsMono Nerd Font",
    "editor.fontSize": 14,
    "editor.rulers": [80, 120],
    "editor.minimap.enabled": false,

    "terminal.integrated.fontFamily": "JetBrainsMono Nerd Font",
    "terminal.integrated.fontSize": 14,

    "files.trimTrailingWhitespace": true,
    "files.associations": { "*.mdx": "markdown" },

    "latex-workshop.latex.recipe.default": "Latexmk (LuaLaTex)",
    "latex-workshop.latex.outDir": "./build",
    "latex-workshop.latex.recipes": [
        { "name": "Latexmk (LuaLaTex)", "tools": ["latexmk (lualatex)"] }
    ],
    "latex-workshop.latex.tools": [
        {
            "name": "latexmk (lualatex)",
            "command": "latexmk",
            "args": [
                "-lualatex",
                "-shell-escape",
                "-synctex=1",
                "-interaction=nonstopmode",
                "-output-directory=./build",
                "%DOC%"
            ]
        }
    ]
}
EOF
)"

echo "${SETTINGS}" > "${HOME}/Library/Application Support/Code/User/settings.json"
Python

There are many ways to install Python, and I recommend using the uv package manager for the best experience. Other options like conda, pyenv, or the official installers from Python.org are reliable and effective but may become limiting as your Python expertise grows.
Just know that uv will help you with tasks like:
- Installing specific Python versions
- Creating and managing virtual environments
- Installing and managing Python packages and tools
- Replacing several tools like
conda,pyenv,pip,poetry,virtualenv, and more
uv, visit the official documentation at docs.astral.sh/uv.1. Install uv
brew install uv2. Update the shell PATH
uv tool update-shell3. Install Python
uv python install4. Running Python Code
uv run my_python_script.py5. Launching the Python interpreter
uv run pythonIPython interpreter

IPython is a powerful interactive Python shell that provides a rich environment for data exploration, experimentation, and visualisation. It offers features like code completion, syntax highlighting, and the ability to execute code line by line. It is great for interactive learning and experimentation.
1. Install IPython
uv tool install ipython --with pip2. Launch the IPython Interpreter
ipythonJupyterLab

JupyterLab is a web application for creating interactive documents that combine code, text, equations, and rich visuals. It provides Python learners with an intuitive environment for coding and experimentation.
1. Install JupyterLab
uv tool install jupyterlab2. Launch JupyterLab
jupyter-labLaTeX

LaTeX is a typesetting system widely used for creating professional-quality documents, especially those containing mathematical formulas, tables, and references. It allows precise control over document layout and formatting, making it ideal for academic papers, technical reports, and books.
On macOS, MacTeX is an all-in-one installer that provides everything needed to run LaTeX.
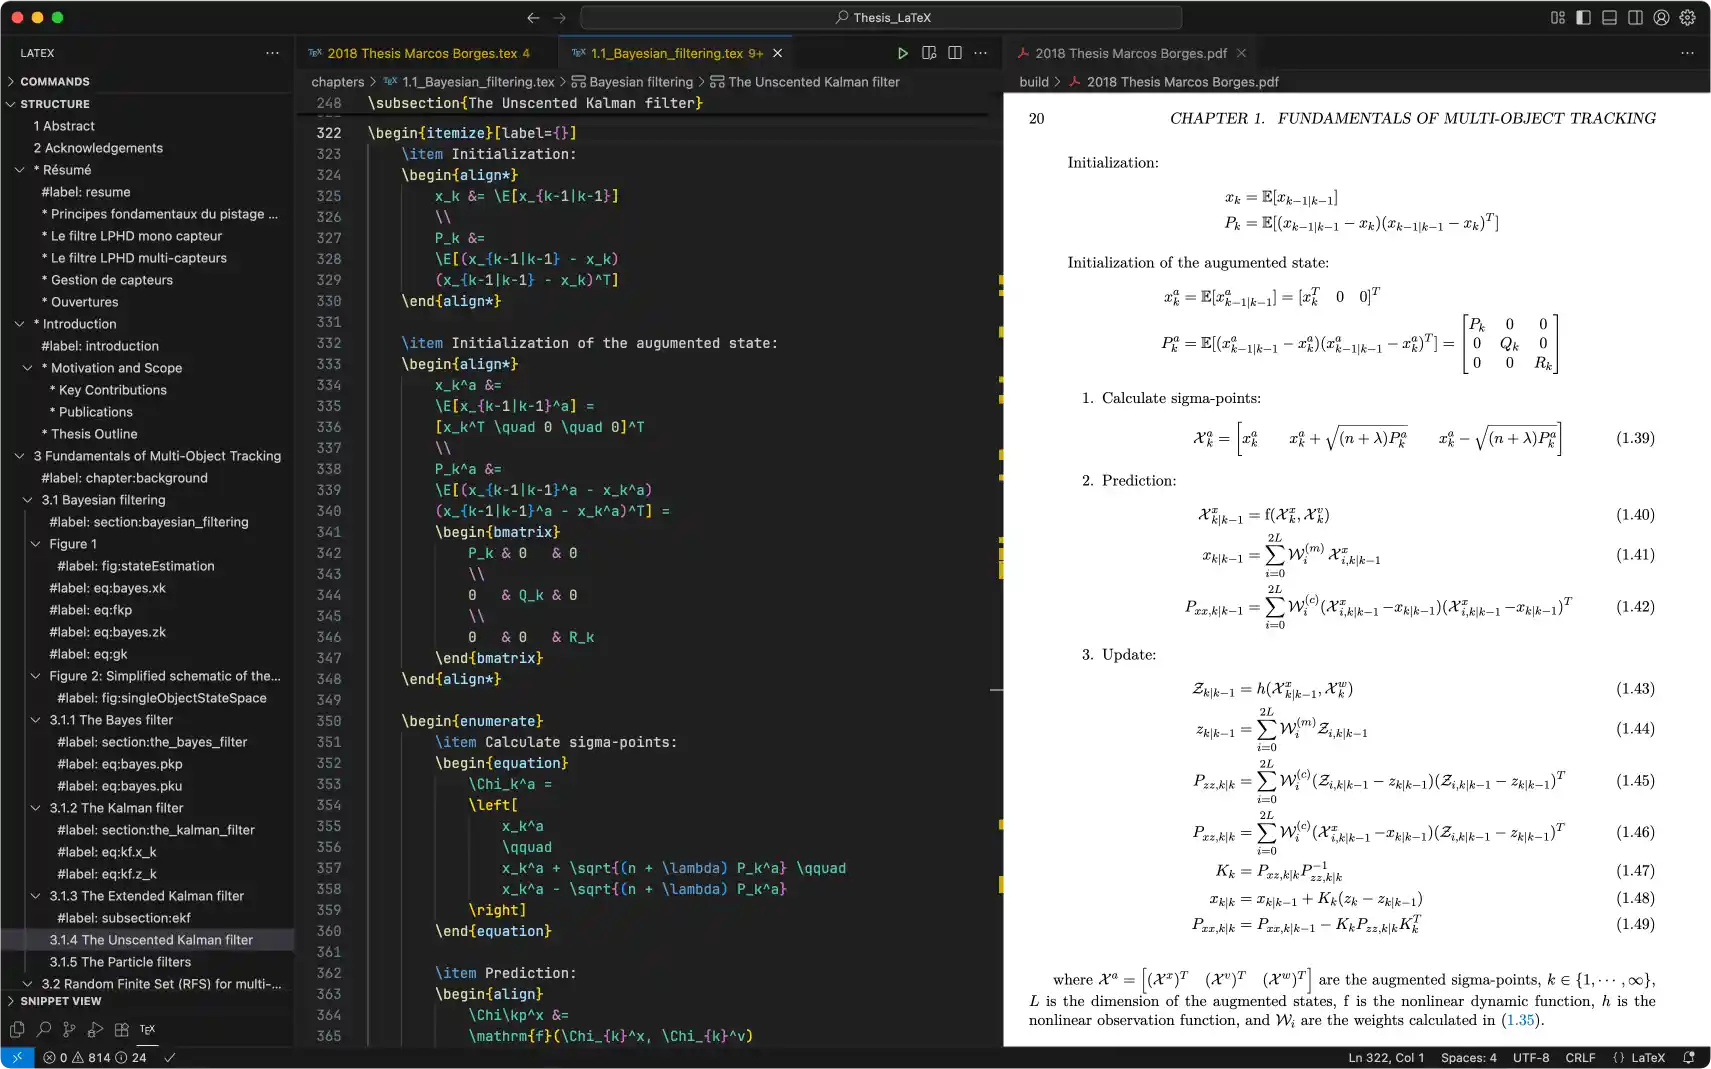
I usually edit my LaTeX documents in VS Code using the LaTeX Workshop extension, which offers a wide range of powerful features:
- Full LaTeX language support with syntax highlighting
- Linting, snippets, and debugging tools to catch errors early
- Live PDF preview that updates on-the-fly
- Integration with Git for version control
- Auto-completion for commands, citations, and references
- Build automation to compile documents with a single command
- Forward and inverse search between source code and PDF for easier navigation
This setup makes writing, editing, and managing LaTeX documents faster and more efficient.
1. Install MacTeX
brew install mactex-no-gui2. Install the Open Sans font
brew install font-open-sans